Tuesday 30 June 2015

My First Quilt

Guys! I made a quilt! This was my sewing dare so I had something to take to uni with me. I'm completely new to quilting so it was a bit of a steep learning curve!
All of the fabrics used are from my stash, and the only thing I bought was the wadding for around 15 pounds, so it was a pretty cost effective project! However, now I see why there is such a thing as quilting cotton. Some of the lighterweight cottons I used didn't behave well atall. Next time I would underline them or just use the proper fabric!

I wanted a fairly simple block design as 80 of them would be needed and I knew I wouldn't have enough patience to make 80 complicated blocks. I had a snoop around pinterest and decided to make a value quilt which was very straightforward. Although I did get pretty bored after the 68th block. For the 4 corners of the quilt I wanted 4 of my favourite animals to make it a bit more personal. I choose a moose, elephant, dinosaur and penguin.
I found it very confusing to determine the size of everything. A twin quilt seemed to be the size needed for a single bed. Quilters seam allowances seem to be 1/4" so I made my blocks 9 1/2" and their finished measurement was 8 1/2". So I did 10 rows of 8 blocks.
After sewing all of the blocks together to make the quilt top I pieced the leftover fabric for the bottom. I then quilted from the centre to the edges in little diamonds, 1/4" from the seamline and halfway through the block. It was at this point that I learnt why quilters use safety pins to keep all of the layers in place. I also found out why there are specific sewing machines for quilters.
When everything was quilted I made the binding (all 308" of it) and sewed it to the bottom first, so I could be more accurate when attaching it to the top. Next time I'd probably do it by hand as my hands did slip a bit every now and then...
I did enjoy my foray into quilting, but I think that's the last one I'll make for a while! It takes a lot longer to see results than in garment making, but I suppose a quilt is on your bed everyday so it gets more daily use than garments which justifies the time spent on it?
Thanks very much for reading and to Gillian for the perfect dare!
Lauren 

Friday 19 June 2015

Ginger Flares

Good morrow everyone! I've finally had a crack at some 
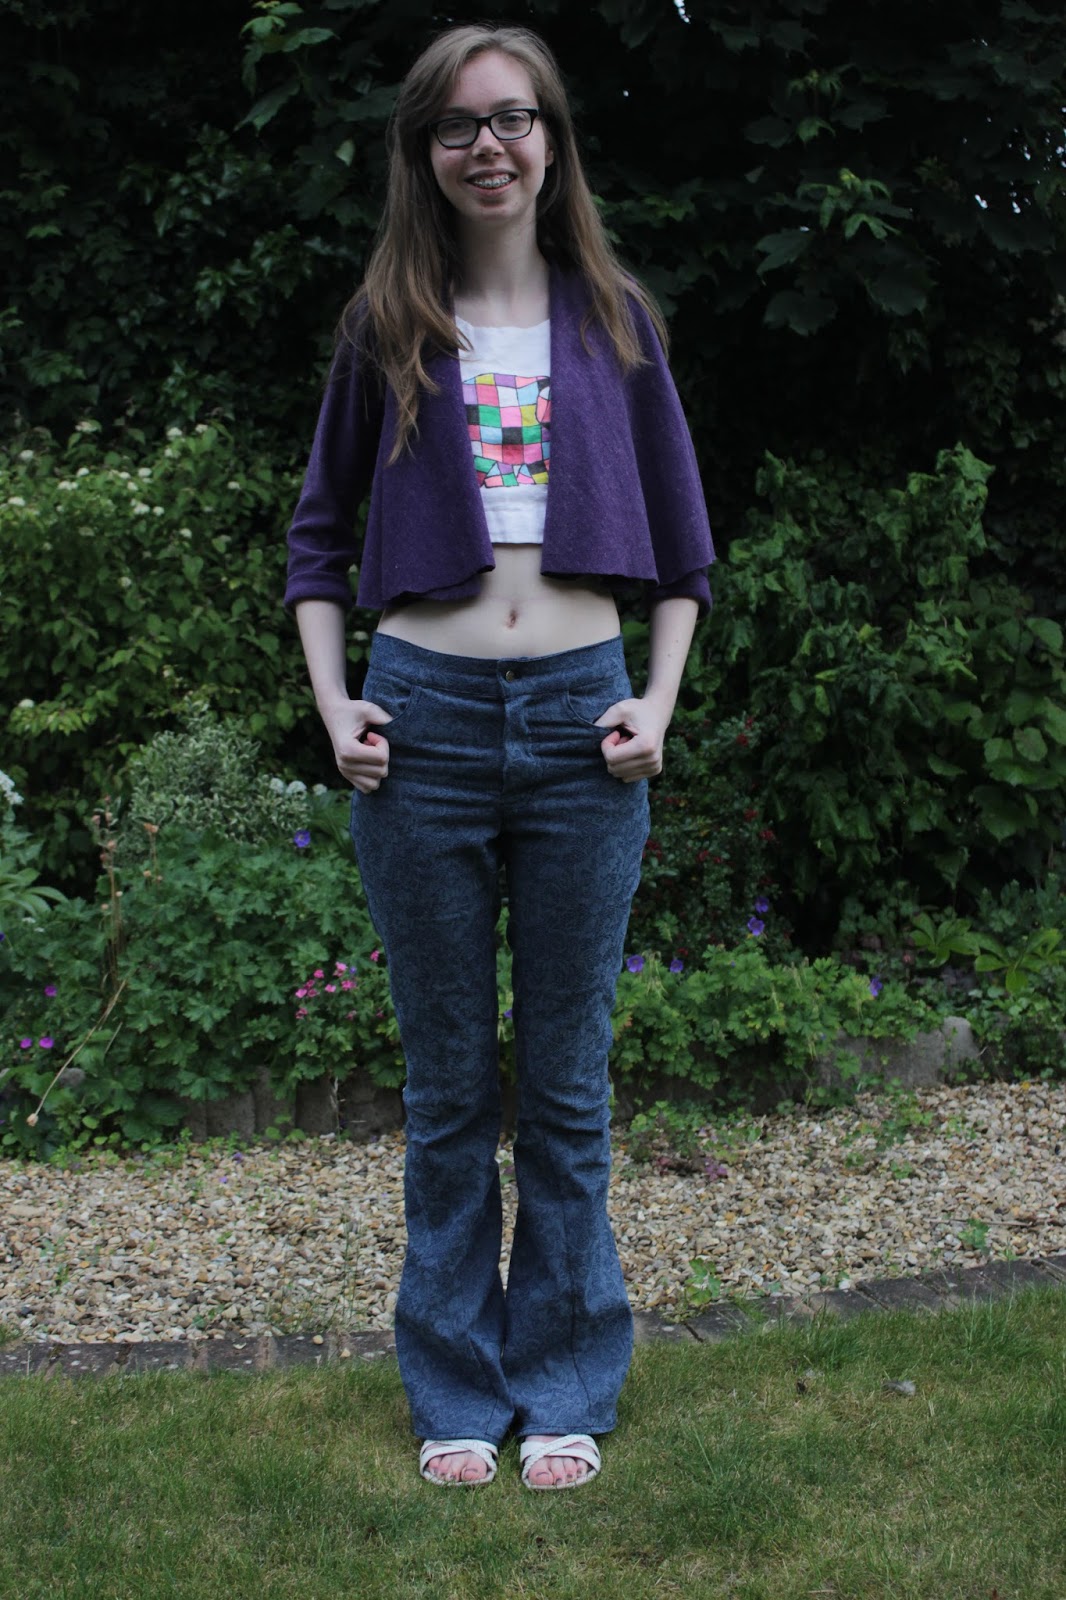
Ginger Jeans.  After seeing an instagram pic of some flares I couldn't get them out of my mind. When I read about the 70s comeback a couple of months ago, I thought it was awful. Fashion should be moving forwards, not backwards! Anyway, here I am, with my new flares. And I might have just made a button-front denim A-line skirt as well. What can I say! I didn't get to live the 70s first time around, but at least I can pick out the best bits now!
 It's not a jeans silhouette I've tried before, but I reckoned that if I didn't like it I could just slim down the legs, following the original pattern. To make the hem flared I followed the instructions in my pattern drafting book, which were pretty easy to follow. I tried to pay special attention when cutting, to make sure the pattern pieces were on grain, but the inner leg seams twist forwards pretty dramatically. Next time I'll cut on a single layer to be sure it's on grain.
The sewing up of the jeans went okay. I didn't bother with flatfelled seams but instead overlocked and topstitched them down. I used navy top-stitching thread, which only has a slight contrast. I used a patterned denim bought on a trip to Edinburgh last year.
 It doesn't have much stretch so I cut out a size 2 which is a couple of inches bigger than my hip measurement. The fit was perfect at the hips, but I needed to loosen them up a bit at the knees. Attaching the fly front zip went surprisingly well, following the sewalong! The way the pockets are attached is genius. I combined the back yoke and back leg piece and cut them out as 1.
I was so pleased with the buttonhole! Buttonholes look so much nicer when sewn using top-stitching thread! The really cute jeans button I bought in a pack of 10 from ebay. The topstitching is mostly on track. Luckily the bits that are off track aren't too noticeable in the navy thread.

To fully embrace the 70s vibe I thought I'd bring out some of the clothes Grandma made and I inherited. The front of the waist coat is all hand embroidered beautifully!
It must have taken forever! Embroidery with mirrors is known as Shisha Embroidery. It's a classic Indian textile art and 'Shisha' means 'Little glass' in Hindi. There are 3 islamic beliefs about mirrors: They trap the evil eyes reflection, reflect the eye away from the wearer or blind the evil eye, so they are there as protection for the wearer. The mirrors are traditionally made from blown glass which is silvered on the back and broken into various shapes and sizes. The mirrors are secured with a tight framework, and no glue is used. The framework covers the mirror face and is pulled aside by cretan stitches leaving the mirror exposed in the centre,
This tunic has little seashells as buttons, and applique at the cuffs and centre front.
But, there is just as much going on in the back! There is some more shisha embroidery and applique. I love the amount of skill, patience and work that must have gone on these garments. Even though I don't wear them on a daily basis, I'm glad that I brought them out for this photoshoot.
So, I'm really pleased with my jeans! I've decided that I like flares and now I want to make all of the jeans! Exams are now over, so it's time for a summer of sewing!!! Thank you to Edward for taking pictures!
Lauren xx

Sunday 14 June 2015

Culotte Jumpsuit

Continuing with my new-found love of culottes I decided to try some longer ones, added to my bodice block to make a jumpsuit. I had one fabric in the stash that was perfect, given to me by a fellow clarinetist a year or two ago. I think it's silk, and the colours in the print are just gorgeous. 
 I used the same vintage culotte pattern that I made my purple culottes from, which is Simplicity 7463. For my purple ones I made the white pair, and I was planning on lengthening those, but with the pleat in the middle it wouldn't fit onto the fabric. Instead I used the pattern pieces for the light blue culottes, lengthened another couple of inches.
The hips were a couple of inches wider than my measurements, so I used the excess to make a little pleat each side. I didn't sew the darts, but pleated them to match the culottes. I think in this version they are a little too far away from the centre front, so I'd move them closer next time.
These culottes were as much of a nightmare to hem as the last ones. Seeing as they were too long to hem while wearing them, I hung them on a hanger and evened the hem that way. I think the fullness in each of the legs is perfect.
I wasn't sure if I'd like the length, but I think it works with my (only pair) of heels. I feel very elegant when wearing it. There is a bit of gaping at the back neckline unfortunately. It had to have a lapped zipper as that was only what I had in my stash, and I can never make them particularly invisible, but I think I've finally mastered it. Upon reflection, putting the zip in the centre back seam would have been a better idea, as it takes a bit of wriggling to get into.
It's finished off really cleanly inside with all raw edges overlocked. The armholes and neckline I used bias binding for (using the fabric scraps) which was slipstitched invisibly to the wrong side. The hem was turned under twice and slipstitched. 
I finished it just in time to go and see The Piano Guys in Nottingham, and they were fantastic! Thanks very much for reading, and to Ed for taking pictures. 
Lauren xx


Tuesday 9 June 2015

Pink Summer Jersey Dress

Hello all! Today's Minerva make is quite a simple one. Now I've left school and am free of a restrictive dress code, I had to have a think about what sort of direction I wanted my wardrobe to go in. My key words were comfortable, stylish and easy to wear, which of course led me to knits. So, I'd decided that a knit dress was the way to go, but I wanted it to be a bit different. This is what I came up with. 

I hacked the Deer and Doe free Plantain T-shirt into a swing dress by slashing and spreading which added volume to the side seam. It did distort the armscythe a little, but it seems to be okay when worn. I also added a fair bit of length to the hem. I did add another 2" of length when the pattern piece was pinned to the fabric because I was worried it would be a tad too short. I used the same pattern piece for the front and the back. Next time I need to raise the neckline because it's appallingly low on me. Seriously, you can see everything. The viscose knit is pretty stretchy and the weight of the dress drags it down a bit lower than it would on a more stable knit.  It's just as well the shoulder ties cross over it.
I'm going to call the rectangles hanging down from the fabric shoulder ties, because I'm not quite sure what else to call them! For the shoulder ties I cut 2 rectangles 39" long and 6" wide because that's what I could get out of the leftover fabric when the main body of the dress was cut out. I just left the edges of the rectangles raw because they won't fray, and I didn't want to add bulk.
 After a bit of fiddling around and unpicking I decided that the best way to attach the shoulder ties was to cut the front neckband piece in two- one for the front and one for the back, sewing them on separately before the shoulder seams are sewn together. Then I pleated one of the shoulder ties to fit the width of the dress front shoulder. The shoulder tie will then cover the front neckband. Then, when the shoulder tie is sandwiched between the front and back dress shoulder pieces, sew the shoulder seam. Repeat for the other side of the dress.
Then, the ties can be crossed at the bust and tied at the back, which also cinches in the waist nicely, creating a pleasing silhouette. They can be tacked down where they cross to keep them in place.
 The viscose is ever so soft and drapes beautifully. Its really stretchy and comfortable to wear and the colour is divine! It also irons really easily (Yes, I, Lauren Digby, used an iron). I normally go straight for prints, but the plain colour really helps the crossover detail to stand out. Although, it could be very interesting in stripes...
So, is this dress comfortable, stylish and easy to wear? Absolutely, without a doubt. Thanks to Minerva Crafts for providing the fabric!
Lauren xx

Friday 5 June 2015

MMM15 Recap

So I did a round up of week 1 and then decided that I'd scrap the weekly thing and do a recap at the end of the month. May was a real mix of clothing for me. I was at school for the first half of the month (which meant suits) and at home for the other half revising (comfy casual). Hence, my clothing at the start of the month was drastically different to the end of the month.


My dark grey suit and new purple (unblogged linen Victoria blazer and Holly trousers) suit were in the highest rotation as I'd lost my navy blazer which would have been in much higher rotation. I did find it in a coffin on the last day of school with my mummy costumes which is good, because I love that blazer, and it'll get a lot of wear even though my school days are over. Same goes for my purple suit. However both of my grey suits are going to be retired now.


My school uniform consisted of blazer, skirt, top and cardi so my purple and green cardi's were in high rotation. I need more cropped cardigans, maybe in pink and turquoise. I wore a toga in honour of eurovision, and completely baffled the lady who knocked on my door who wasn't expecting to see a toga. It is so comfy though! I also had leavers ball that week, and I even finished my dress the night before. That never happens. I usually finish the minute before we leave... When revising I've been living in my purple hudsons and new cropped hudsons. I need more hudsons! My floral dungarees were perfect for golf.
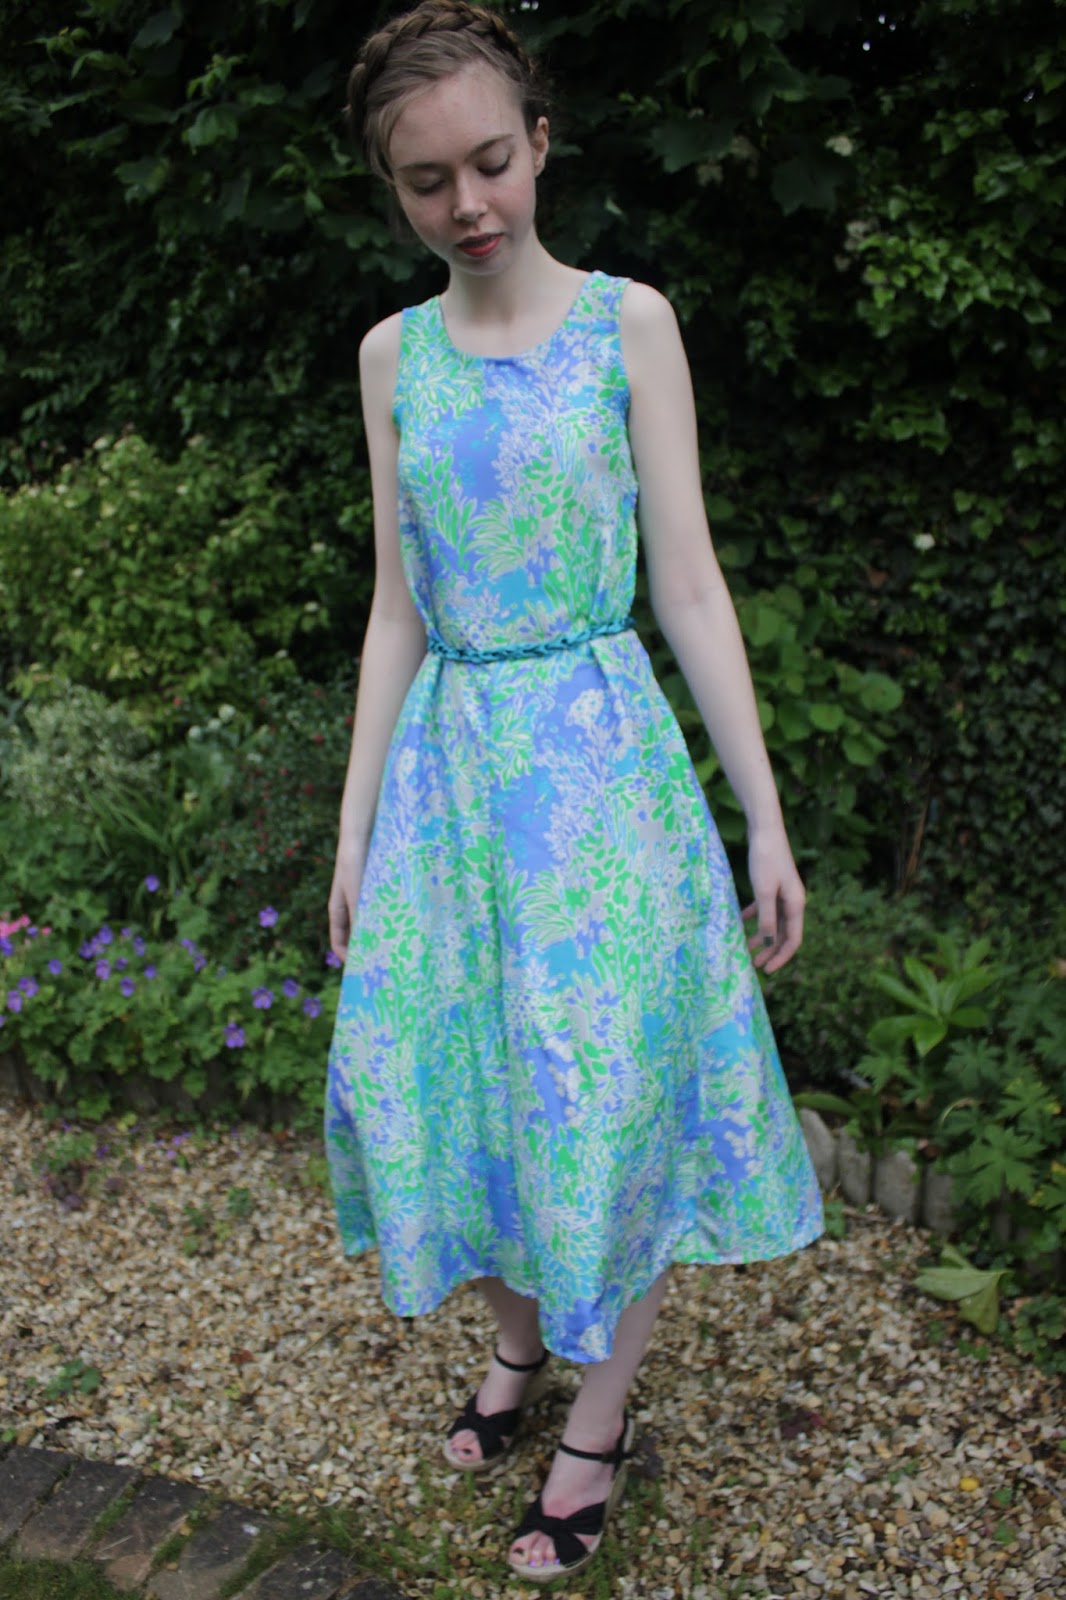
My goal was to not repeat an outfit, and I achieved that which was great. I didn't finish the challenge last year and it was good to finish it with ease this year. Lots of my favourite dresses didn't get a chance to be worn. Now I've finished school I've got to tweak my wardrobe a bit to be more casual. That basically means, sew up all the knits. It's going to be good being able to wear dresses every day of the week! I didn't wear completely me-made this month, because that wasn't the point for me. Mixing old RTW and me-mades worked well. 
Thanks to Beth, Mum, Emma, Edward and Dad for taking photos. 
Lauren xx